
Boss Codex
In the labyrinth a boss bars the way every 10 floors, and on a few special floors. Down to floor 100 the bosses are seven skeleton wardens: you meet the first four one by one on floors 10, 20, 30 and 40, and three more hold the deeper floors up to 100. Beyond floor 100, four new lords of the depths rule the dungeons down to floor 200. The first time you reach each boss, the fight pauses for a short scene in which it confronts you face to face, piece by piece revealing more of what lies below. Later meetings and its phase changes bring a single line instead. Every boss you break can also yield to you as a familiar — see Boss Familiars. This page lists each boss’s stages, how to beat it and what it becomes on your throne.
What every boss has in common
Section titled “What every boss has in common”- Red warnings: every big attack is first marked on the ground in red, and the mark is exactly the hit area. Step outside it and you won’t be hit.
- Red circles: a circle’s position locks the moment it appears, and it goes off when the fill reaches the rim. Some circles land on your group, and some form around the boss itself — for those, move away from the boss, not just aside.
- Red paths: charges and waves first draw a red path from the boss toward you. Its direction is fixed once drawn, so step sideways out of it. A charge rushes along the path; a wave races down it once it fills.
- Falling strikes: some bosses cover the ground in several circles that go off one after another. Each strikes only inside its own circle, and a single volley can hit you only once.
- Summon warnings: small red circles show where adds are about to rise. Standing in one when they burst out hurts.
- No interrupting, but a pause: once a warning is on the ground, the attack can’t be stopped. After a wave, a circle around itself or a volley of falling strikes, and after a charge that misses, the boss stands still for a moment. That’s your opening.
- Final phase: a badly wounded boss warns a little faster and can chain one big attack straight into another.
- Brands and harvests: some bosses brand corpses. If you use a branded corpse first — for a summon, a Corpse Explosion or Absorb — before the boss harvests it, the harvest fails: the boss gets no healing or extra adds, and it edges closer to being staggered.
- Minion hunting: some bosses mark one of your minions and focus it down. When a marked minion falls, its Command comes back, so summon again to refill the front line.
- Rewards: every boss kill drops guaranteed gear carrying one of that boss’s own Exotic options. Kill the same boss enough times to reach its ceiling and a special drop is guaranteed.
- Familiars: every kill fills one link of that boss’s chain. Once it yields, it can take your throne and fight for you — see Boss Familiars.
More dodging tips are in Floors, Combo & Grades, and where each boss appears by zone is in Zones & Affixes.
Bone Marshal
Section titled “Bone Marshal”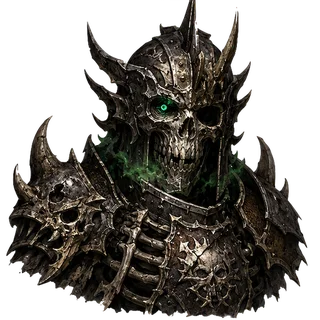
The first warden you meet, and the one that breaks your line by force.
- How it fights: opens each phase with a charge through your front line. It sends bone waves down a red path — two at once when badly wounded — and a row of bursting spikes that marches from it toward you. Once wounded, right after a charge it detonates a wide red circle on your group that briefly stuns anyone left inside, and it raises sturdy adds. When badly wounded it also marks one of your minions to hunt.
- How to beat it: its wide circle has a slightly longer warning, so move well away as soon as it appears. The spikes march in a straight line, so step off that line. Put a Tanker in front to absorb the charge and your ranged minions behind stay safe.
- Gear it tends to drop: Corpse Explosion gear, leaning toward the Rite line
- As a familiar: army aura speeds up your melee minions’ attacks; signatures Line Breaker Charge and Bone Wave
Grave Ritualist
Section titled “Grave Ritualist”
A boss that feeds on corpses and grows stronger the longer the fight drags on.
- How it fights: brands corpses and harvests them to heal and raise more adds. When you’re close it bursts a red circle around itself, and it rains soul-fire in circles around itself. Once wounded, while its brands wait to be harvested, it also throws a small, fast red circle on your group. When badly wounded, the circle around itself leads straight into the small one.
- How to beat it: use branded corpses the moment you see them — summon, Corpse Explosion or Absorb. A failed harvest cuts off its healing and reinforcements. When a circle forms around the boss, move away from it; the small circle only needs a short sidestep.
- Gear it tends to drop: minion and Bleed gear, leaning toward the Legion line
- As a familiar: army aura makes your minions take less damage; signatures Harvest Circle and Corpse Offering (heals allies)
Grave Tax Collector
Section titled “Grave Tax Collector”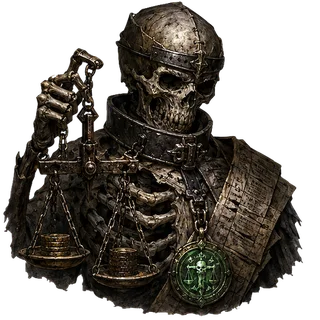
A boss that fights from behind a crowd of adds.
- How it fights: keeps a retinue of adds. While it has none, it only swings at you and calls new ones. With its retinue up, it brands corpses but never harvests them, and drops falling strikes one after another at your feet. While its brands are on the ground it charges and throws a small, fast red circle. Once wounded it marks your minions to hunt, and when badly wounded a charge leads straight into the small circle.
- How to beat it: clear the crowd with Corpse Explosion to open a path to the boss; without its retinue it can only swing and summon, so that’s your window. Keep moving while the falling strikes chase you. The corpses its adds leave behind become fresh summoning material.
- Gear it tends to drop: Command gear, leaning toward the Legion line
- As a familiar: army aura gives kills a chance to leave an extra corpse; signatures Levy and Ledger Weight
Soul Legate
Section titled “Soul Legate”
The commander of the first four wardens, mixing every trick they have.
- How it fights: commands a line of ranged adds. While none are alive, it only swings at you and calls new ones. With its formation up it charges, and brands and harvests corpses to heal. Once wounded it hunts your minions, sends a wave of soul-fire down a red path, and rings you with circles that go off before the one in the middle. When badly wounded a charge leads straight into a wave.
- How to beat it: thin out its ranged adds to shut down most of its moves. When circles ring you, don’t wait in the middle; it goes off last. Use branded corpses first to cut off its healing, and resummon marked minions as soon as they fall.
- Gear it tends to drop: Teleport gear, leaning toward the Carnage line
- As a familiar: army aura raises your Command cap; signatures Host Charge and Soul Wave
Wraith Jailer
Section titled “Wraith Jailer”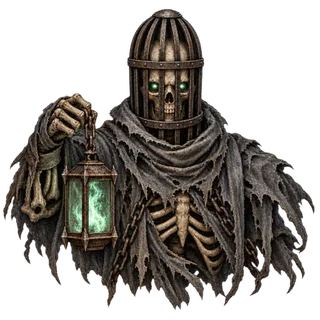
The jailer of the Wraith Hollows, who keeps the captives’ souls in his lantern. Every blow he lands is cold.
- How it fights: never charges. It lashes chains of frost down long red paths — two at once when badly wounded — and when you’re close it closes a red circle around itself. Both slow you on a hit. Once wounded it also drops a freezing field on your group, calls adds whose hits cause Bleed, and brings down icicles, the first on you and the rest around you, which slow as well. When badly wounded it hunts one of your minions, and its circle leads straight into a chain lash.
- How to beat it: being slowed is the real danger, because one hit makes the next warning harder to escape. Its red paths are long, so step sideways early instead of backing away. When icicle circles appear, leave at once rather than dodging them one by one.
- Gear it tends to drop: Cold, resistance and minion-survival gear, leaning toward the Legion line
- As a familiar: army aura slows elite enemies; signatures Frost Shackles and Frost Circle
Ash Gatekeeper
Section titled “Ash Gatekeeper”
The guardian of the Abyssal Gate, feeding your village’s stolen fire to the gate. He never fights without his garrison.
- How it fights: keeps a garrison of fire guards. While it is down, he only swings at you and calls new guards. With guards up, he charges when you keep your distance, slams a red circle around himself when you’re close, and sends a collapsing wall, a wide wave down a red path. He also drops meteors, the first on you and the rest around you. The slam and the meteors briefly stun you on a hit, and so can his own blows. When badly wounded he calls more guards, the meteors become a larger shower, and a charge leads straight into the slam.
- How to beat it: cut down the garrison first — Corpse Explosion works well — and hit him hard while he rebuilds it. Don’t stand next to him when a circle forms around him. The collapsing wall is wide, so step well to the side.
- Gear it tends to drop: Fire and critical-hit gear, leaning toward the Carnage line
- As a familiar: army aura adds fire damage to your minions; signatures Ember Wave and Furnace Nova
Void Regent
Section titled “Void Regent”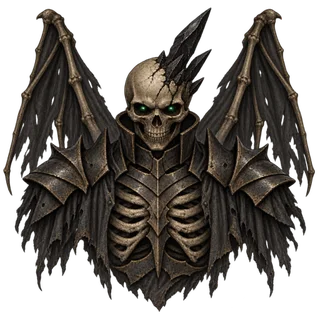
The ruler of the Void Sanctum, reigning in the Ember-Eater’s name. It uses every element against you.
- How it fights: brands corpses and harvests them to heal a little and raise an elite: a Frostreaver in its first phase, a Cinderguard once wounded, and a Marrow Reaver when badly wounded. It charges down red paths and sends an erasing wave that can leave you vulnerable, taking more damage for a moment. Once wounded it opens a well of oblivion on your group while its brands wait, collapses a red circle around itself and rains void shards in circles around itself, and each can leave you vulnerable. When badly wounded it sends two waves at once, follows them with a well, and hunts one of your minions. Its own blows cause Bleed.
- How to beat it: deny every harvest, since each one brings an elite onto the field. Being vulnerable makes the next hit worse, so after taking one, get clear before the next warning lands.
- Gear it tends to drop: Dark, resistance and Corpse Explosion gear, leaning toward the Rite line
- As a familiar: army aura gives your minions elemental resistance; signatures Void Charge and Void Circle
Carrion Titan
Section titled “Carrion Titan”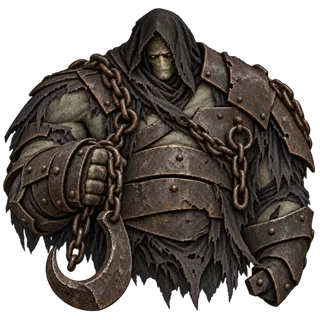
The first lord of the depths beyond floor 100, a mountain of rotting flesh at the head of the Carrion March.
- How it fights: charges down red paths and slams a red circle around itself. It bursts corpses near your group, leaving a lingering pool, and calls adds once it is badly wounded.
- How to beat it: keep your group off the corpses it can burst, and step out of the pools they leave. Sidestep the charge, and back away from the boss when a circle forms around it.
- As a familiar: army aura raises your minions’ max HP; signatures Carrion March (makes enemies bleed) and Corpse Rupture
Kilnheart
Section titled “Kilnheart”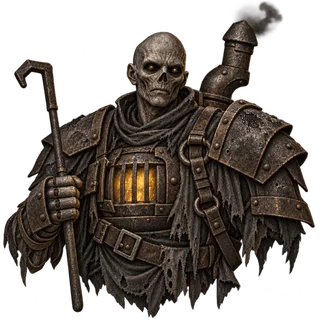
The furnace at the heart of the Cinder Pyre, setting the dead alight.
- How it fights: sets corpses near your group ablaze and keeps calling adds. Once wounded it also slams a red circle around itself and rains falling strikes in circles.
- How to beat it: spend corpses yourself before it can ignite them, and keep moving when the falling strikes begin. Don’t stand next to it when a circle forms around it.
- As a familiar: army aura boosts Corpse Explosion damage; signatures Corpse Ignition and Kiln Nova
Rimemaw
Section titled “Rimemaw”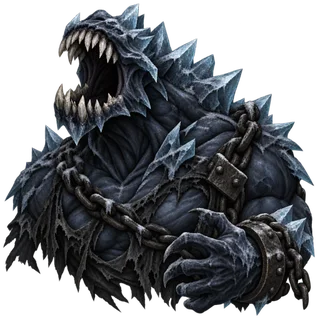
The maw of the Frostgorge, a hunger that freezes whatever it touches.
- How it fights: keeps calling adds. Once wounded it sends freezing waves down red paths, and it refuses to die once — it survives a killing blow and shields itself in frost for a moment.
- How to beat it: step sideways out of the waves, because being frozen leaves you open. Save your burst for after its frost shell breaks, since the first killing blow won’t finish it.
- As a familiar: army aura makes enemies stay frozen longer; signatures Rime Wave and Maw’s Tenacity
Glutton Sovereign
Section titled “Glutton Sovereign”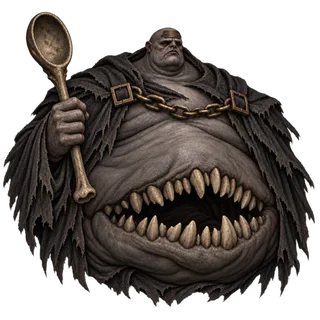
The ruler of the Umbral Glut, the final hunger at the bottom of the labyrinth.
- How it fights: calls adds and harvests corpses to heal itself. Once wounded it rains falling strikes in circles around your group.
- How to beat it: use corpses before it harvests them to cut off its healing. Keep moving through the falling strikes rather than waiting for a gap.
- As a familiar: army aura restores Command on kills; signatures Devour and Gluttonous Rain